Audio elements
Place immersion at the heart of your mediation
Often wrongly overlooked, audio narration is a real asset for visitor immersion. With this guide, you will learn how to add and highlight audio tracks in your eCorpus scene.
Overview of the Audio Feature
Test an Audio Scene on eCorpus
Summary
Import Audio Tracks into an eCorpus Scene
How to prepare audio tracks for proper implementation in eCorpus
Before implementing your first audio tracks in eCorpus, it is important to ensure that the sound tracks are properly prepared. eCorpus is not limited in the number of audio files integrated into the scene; however, only .mp3 files are usable for this feature.
How to organize the production of your audio tracks?
Just like the Annotations, Articles, and Guided Tours features, the Audio Narration feature creates an icon in the upper left of your scene viewer, which the user can click to launch the linked audio track.
Note: Audio Narration can only contain a single audio track
In this regard, two approaches are possible:
-
Narration serves as an introduction to the scene. It can provide the main semantic information, invite the user to start guided tours, or serve as ambient sound to facilitate user immersion. The rest of the sound information will then be provided in the form of audio tracks linked to annotations.
-
Narration compiles all the information given about the presented work. Excerpts from this general track can then be provided with context in the form of audio tracks linked to annotations. This is the case, for example, with the Gargoyle scene, given as an example above.
The preparation of the tracks is therefore done according to the desired staging. It is still recommended to keep one sound track containing all the different parts of the script. This so-called “Master” track will ensure easy editing for possible sound adjustments or fragmentation of tracks via a third-party audio processing software.
Edit and create your tracks yourself using audio editing software
Many solutions are available for the creation and editing of audio tracks. You are completely free to choose the one that best suits your needs, as long as the exported file is in .mp3 format.
For those looking for free and open-source audio editing software, we recommend Audacity. A guide teaching the basics of the software will be presented soon in the Advanced Uses guides.
Add and create audio tracks in an eCorpus scene
To be able to use audio narration in eCorpus, it is essential to import the desired .mp3 files into the eCorpus scene you want to edit. First, go to your eCorpus database, and select the “Edit” button in the scene to be updated. If you wish to review the important parameters for scene creation and editing, please refer to this guide.
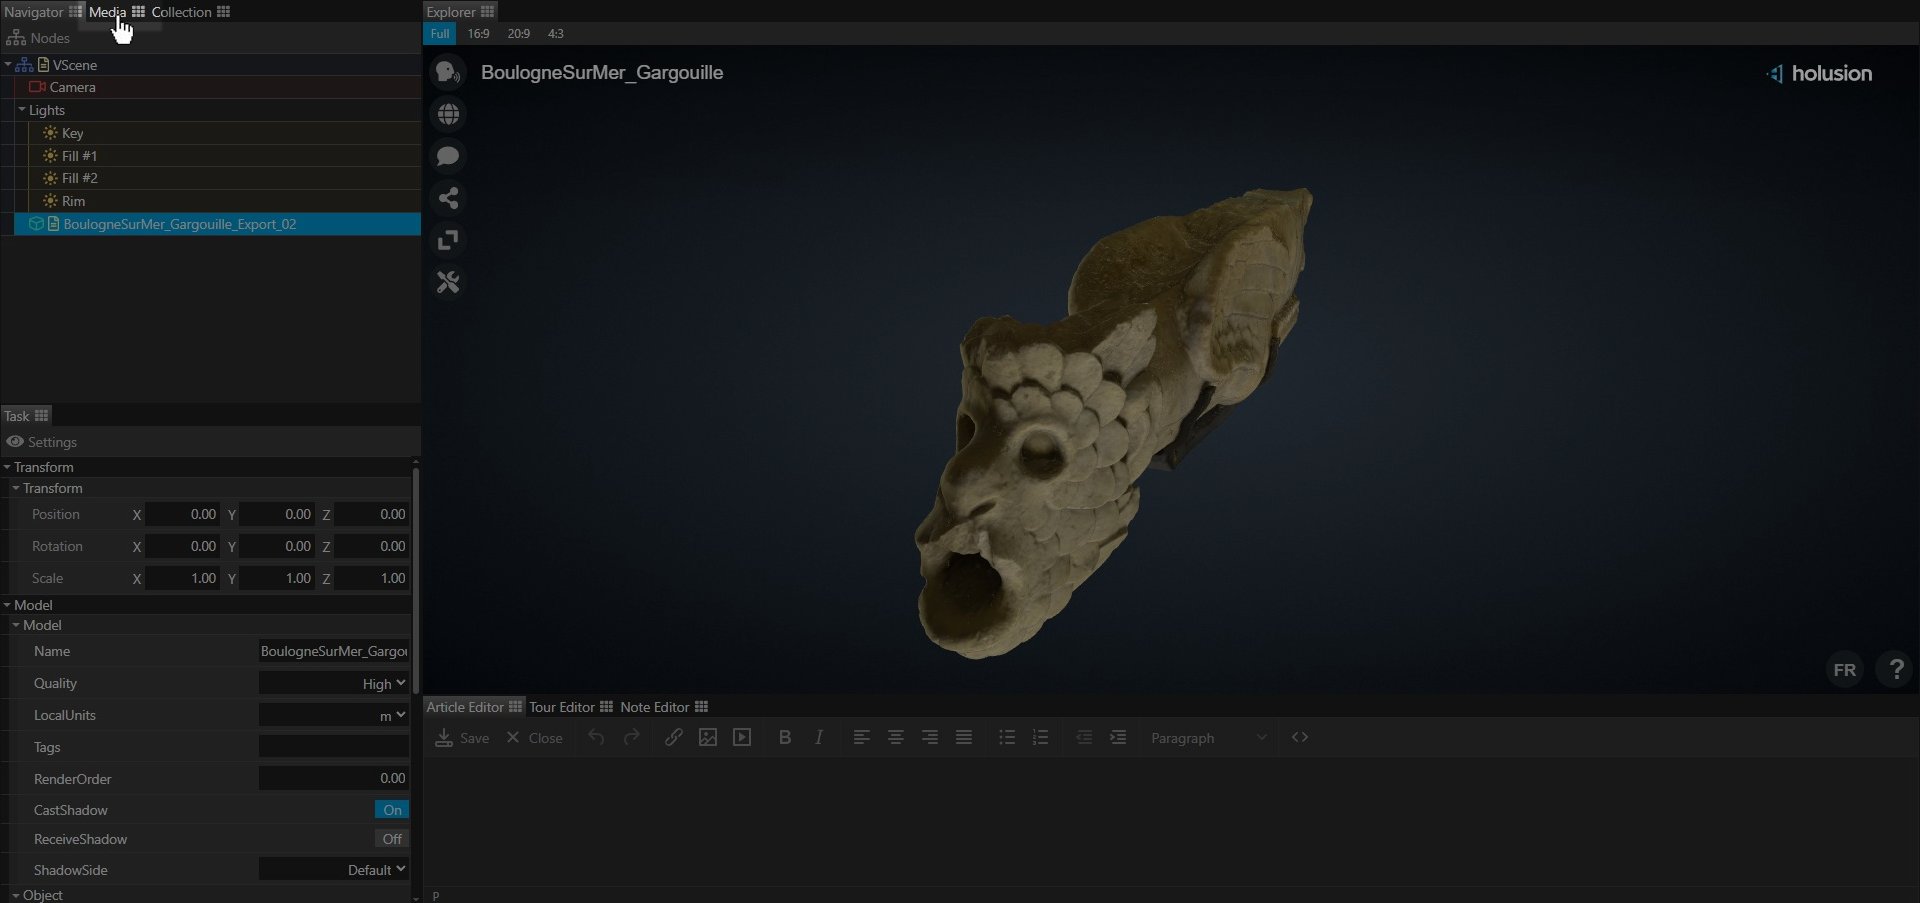
Once in the Edit mode of your scene, go to the “Media” tab, in the upper left of your page.
This tab represents all the annex media present in your scene, such as imported 3D models and captured images for thumbnails.
To import your .mp3 files, select them and drag-and-drop them directly into the Media tab.
Organizing your Media
In order to maintain good visibility within your Media, the tab has two functionalities, described below:
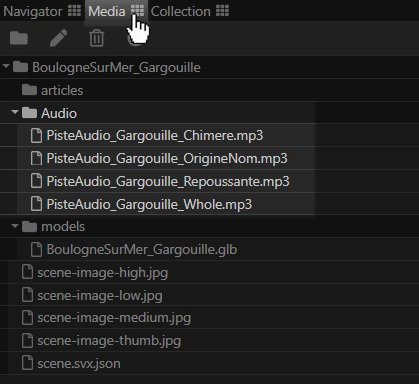
Create Folders

By clicking on the folder-shaped button, you can create folders that you can rename as you wish. You can, for example, create an “Audio” folder to store your audio tracks, as illustrated above.
Tip: if your narration is multilingual, you can create subfolders to organize your media by type, and also by language.
Delete Media
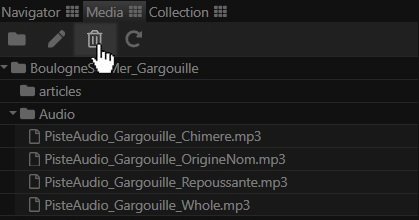
Click on the trash can icon to delete a selected media.
Staging Audio Tracks
Everything to know about Audio Elements
Once your media is imported, it is important to create Audio Elements. These elements function very similarly to annotations.
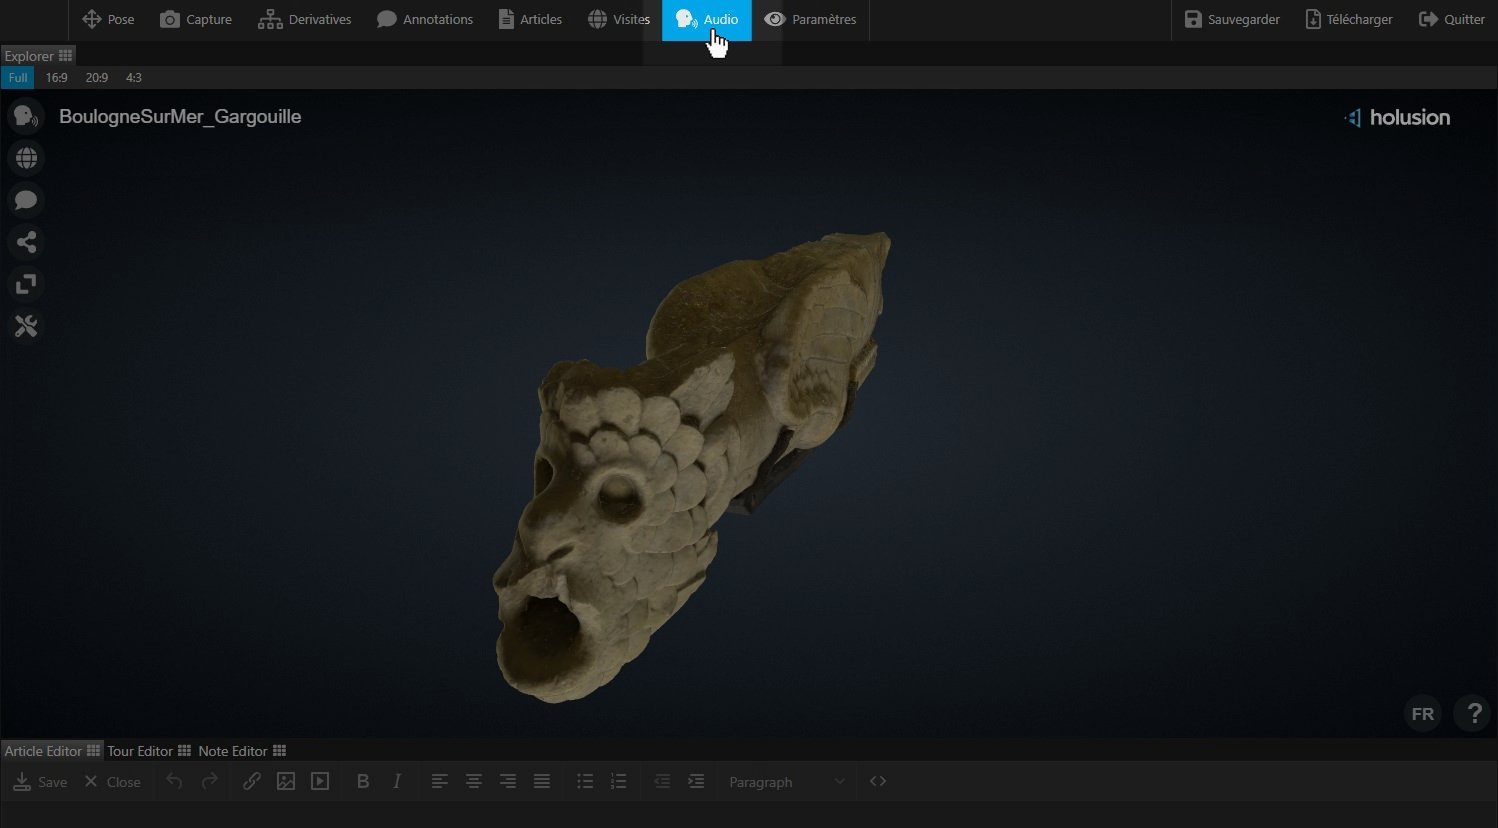
To open the tab specific to audio elements, click on the Audio tab available at the top of the Explorer, to the right of the Guided Tours button.
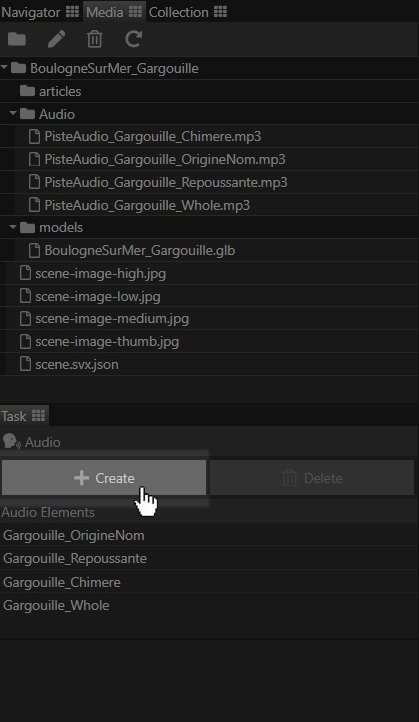
Once clicked, the audio elements tab will open in the lower left of the Explorer, just below the tab containing the Media, where the audio media are deposited.
This tab consists of a list containing the created audio elements, as well as two buttons:
Create
This button allows you to create an audio element.
Delete
This button allows you to delete an audio element. It is grayed out and unusable if the list of audio elements is empty.
Warning: the deletion of an audio element is permanent, and does not delete the audio media to which it is attributed.
The parameters of audio elements
Each audio element contains a list of parameters that you can modify.
Title
This parameter allows you to give a name to your audio element. This name will be displayed in the list of audio elements, and in the annotation audio attribution lists, described below.
Language
This parameter allows you to define the audio track according to the desired language. An audio element can therefore contain several audio tracks, one for each proposed language.
Filepath
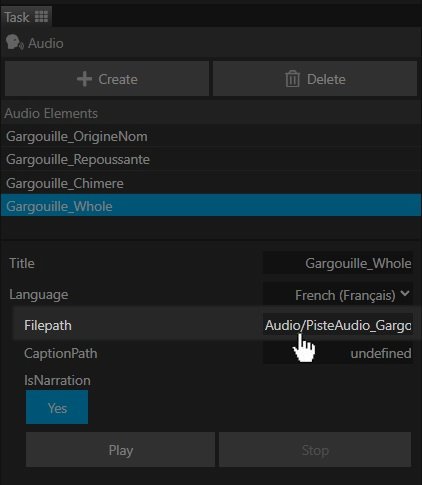
This parameter contains the audio track used by the element. To attribute an audio track, select it in the media, and drag-and-drop the track directly into the Filepath container.
Captionpath
This parameter contains the subtitling media that will play simultaneously with the attributed audio track.
It is not necessary to have a subtitling element for the audio narration to work correctly.
If you wish to integrate subtitling into your audio element, you will need to import your corresponding files into the Media, using the same procedure as for an audio track.
Advanced Note: Creating your own subtitles
Want to create your subtitles yourself? You just need to open any word processing application, such as Windows Notepad, Google Docs, WordPad, Notepad, etc… and write your subtitles in this form:
NB: the tags between $[] are to be replaced with custom values according to your needs.
Here is a concrete example with an excerpt of the subtitling text used for the Gargoyle example:
WEBVTT

00:00.000 --> 00:01.302
If you are a lover of old stones,

00:01.310 --> 00:03.072
or simply an observer

00:03.100 --> 00:06.611
you have surely already seen gargoyles
Once your text is written, you can save it in .vtt format and import it into eCorpus.
If no .vtt export function exists in your application
That’s okay: there is a simple way to bypass this constraint. Save the text in plain text format (.txt). Then, find the file on your computer and rename it to replace .txt with .vtt.
Use the Narration Tool
The Narration icon is very useful for adding an immersive aspect via audio narration. It works according to the same logic as the Annotations and Guided Tours icons: it is displayed in the upper left of the Explorer and launches as soon as the user clicks on it. By default, the icon is not displayed if the Narration parameter is not activated.
To activate the Narration parameter, go to the Audio tab and select the audio element you wish to turn into Audio Narration. If you want to review the step to access this tab, please refer to the previous point.
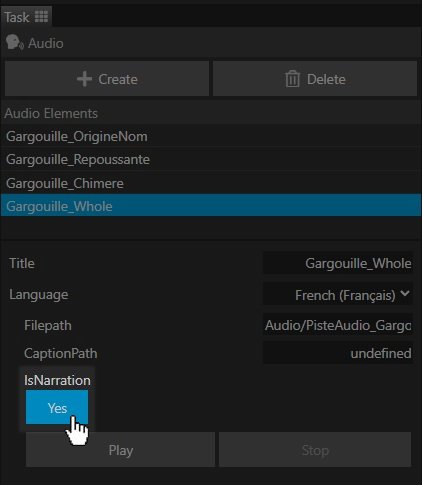
Once the correct audio element is selected, you can click on the button isNarration to activate the Narration icon. Once activated, the button turns blue.
Warning: you can only have one audio element activated among all audio elements. It is impossible to have multiple elements sharing this specification.
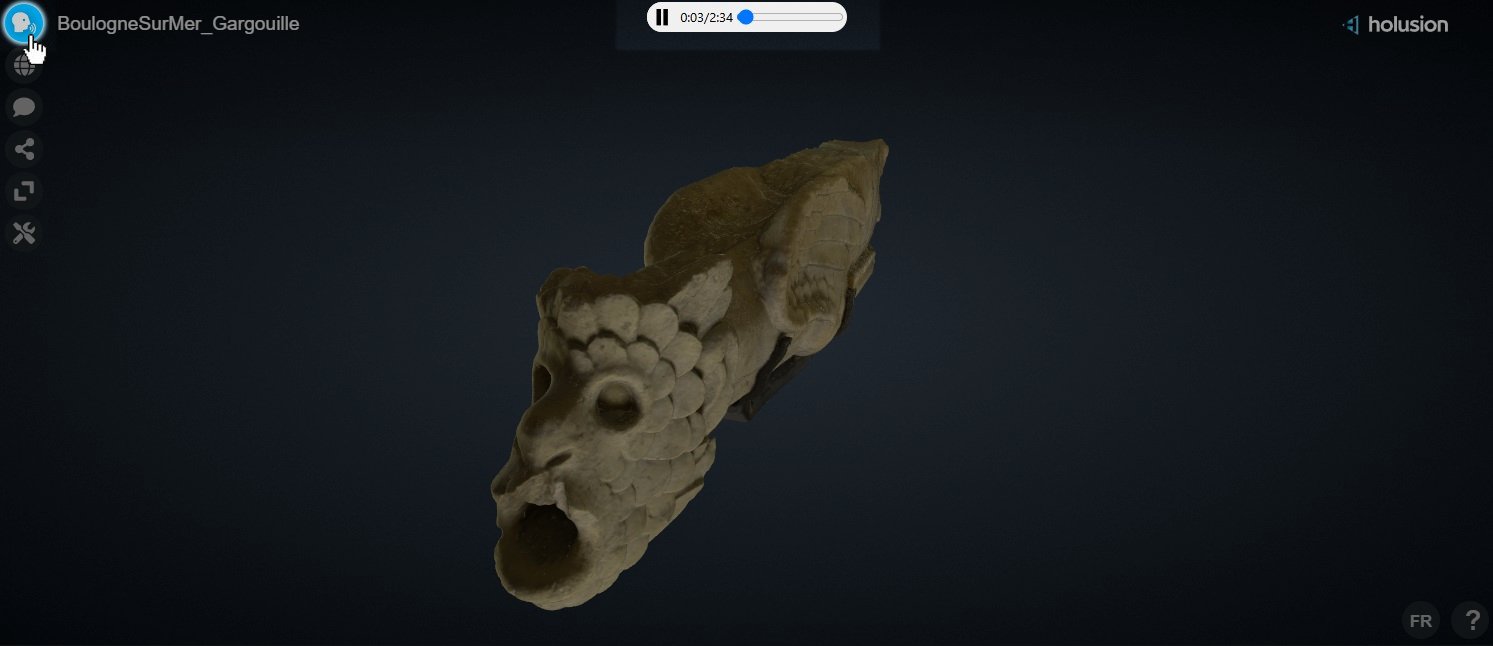
Once clicked, the Narration icon brings up an audio playback bar at the top of the Explorer. The track should play automatically. If you have added subtitles in the “Captionpath” parameter of the element, they should be displayed automatically during audio playback.
If the subtitles do not appear during the playback of an audio track, even though a .vtt file has been associated in the Captionpath of the audio element, verify that the “CC” icon appearing in the bottom right of the explorer is activated (represented by a blue color).

Warning: the subtitle activation icon “CC” is only visible when an audio track is playing.
If the subtitles still do not appear, please re-read the .vtt file carefully to check that no errors have slipped into the file formatting.
Link Audio to Annotations
Similar to Articles, it is entirely possible to link audio elements to annotations.
To do this, select the annotation to which you would like to add an audio element.
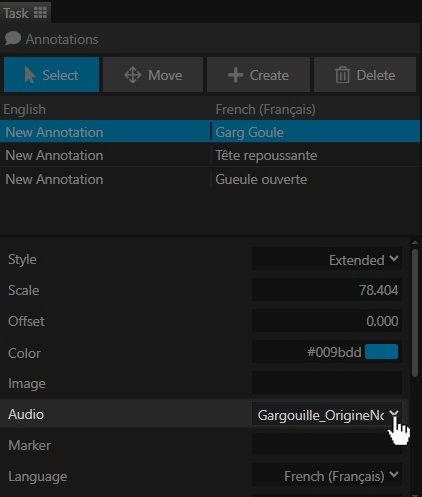
Click on the arrow in the Audio container, within the annotation parameters, to bring up a drop-down list containing the created audio elements. Then select the desired element.
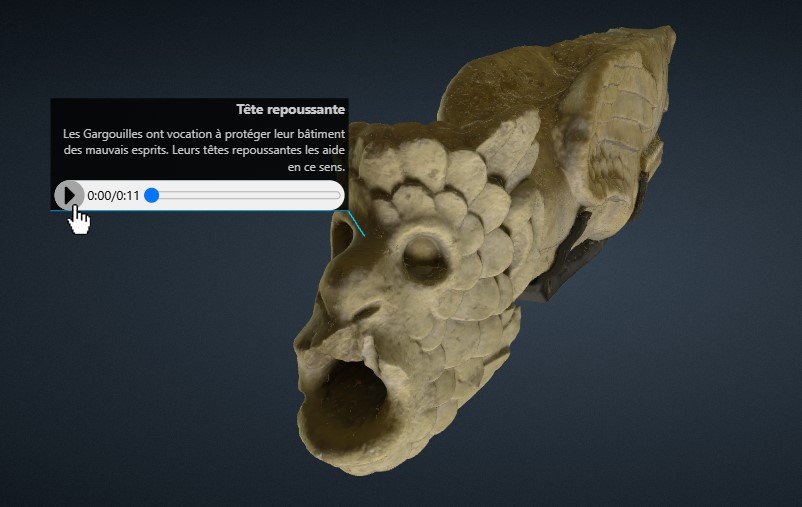
Once the annotation is saved, an audio playback bar should appear in the annotation.
Warning: The annotation style must be set to Extended for the playback bar to appear. You can learn more by following this guide.
Learn More
You have finished the tutorials teaching you the basics of eCorpus, congratulations!
The possibilities offered by eCorpus are numerous, and not all have been mentioned. A category of advanced guides awaits you to discover even more.
Learn more about eCorpus functionalities and how to manage your content by following our advanced guides: Advanced Uses