Go deeper into substance
If, as we saw in the previous tutorial, annotations are the perfect tool to semantically enrich your scene, the constraint of having only a limited number of characters can be too limited. This is where the articles take on their importance: thanks to this functionality, they allow you to go in-depth into the explanation of your subject. In addition, you can also enrich your text with images, tables, as well as video to optimally illustrate your point.
Feature Overview
Summary
Add articles
Articles are very practical for adding textual and pictorial content to illustrate your words and semantically enrich your scenes.
The principle of creating an article is quite similar to that of creating annotations. Each item created is linked to a 3D model present in the scene. Unlike annotations, the model on which an article is created does not matter. We also advise you to create all your articles on a single model to find your way around more easily.
(the 3D models serve as storage for your items!)
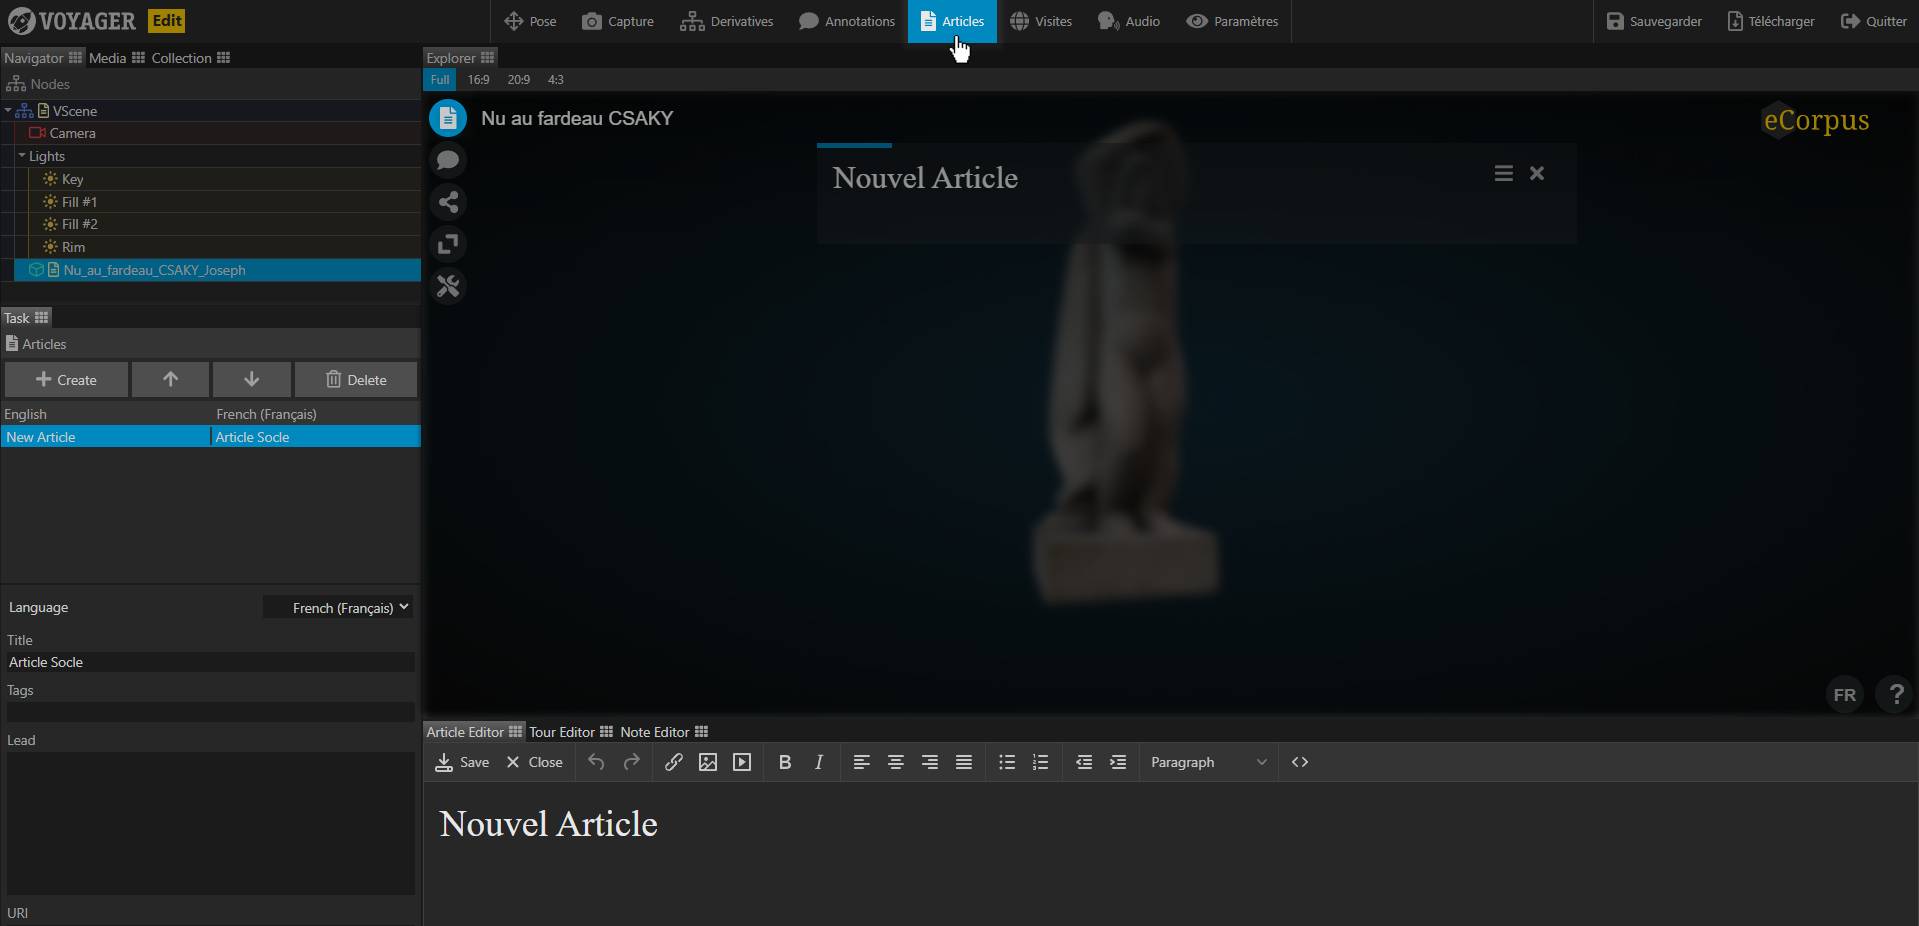
To create articles, first click the Articles button at the top of the Explorer. The “Task” tab at the bottom left will then display the list of articles created on the selected model.
Create an Article
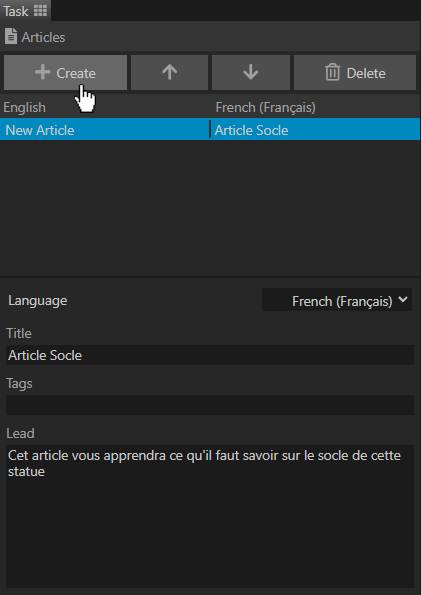
To create an article, simply click on the Create button in the “Task” Tab on the left of the Explorer.
Items appear in the order they are listed. By default, each new article is created at the end of the list. If you want to change the order of an article, simply click on one of the two arrows to the right of the “Create” button. The top arrow allows you to move up a selected item in the list, the bottom arrow allows you to move it down.
Another specificity, the parameters located directly below this list, namely “Title” and “Lead” are not used to modify the content of the article itself, but its title and its description in the list of articles in the viewer.
We advise you to add a meaningful title and a catchy description to make your user want to go further in their reading.
If you wish to change the content of the article, please refer to the following point.
Edit Articles

To change the content of the article, you must go to the Article Editor, available below the Explorer.
The editor allows you to create an article in the classic way, as well as to enhance it with HTML code.
An article generally consists of a title and a body. You can add images, video links
Remember to save your article before exiting it! Any unsaved changes in the article editor will be lost, even if the scene has been saved beforehand.
Save your modifications
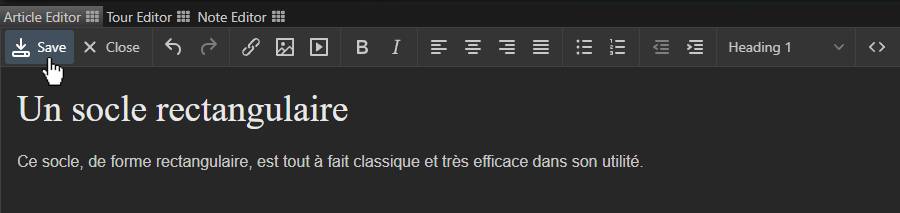
To save your article, click the Save button in the Article Editor.
If you leave your article without saving it, a warning pop-up will open to warn you. You can then choose whether or not to save your modifications.
Delete an article
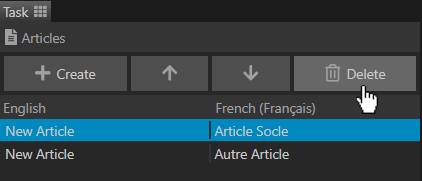
To delete an article, select it from the list in the “Task” tab on the left of Explorer. Then click on the Delete button.
Please note, no warning message will open if you click on this button. So be careful to select the item you want.
If you delete an article by mistake, you can refresh the page to undo the change.
SetUp your scene
Show list of Articles
Just like annotations, an Article icon is automatically displayed if articles have been created in the scene.
To display the articles in a scene viewer, simply click on this icon. A list will be displayed giving access to all the articles saved in the scene.
Please note, the articles created are only displayed if the language of the article is the same as that of the scene.
Therefore, please ensure that the language of your articles always matches that of your scene.
Change your scene’s language
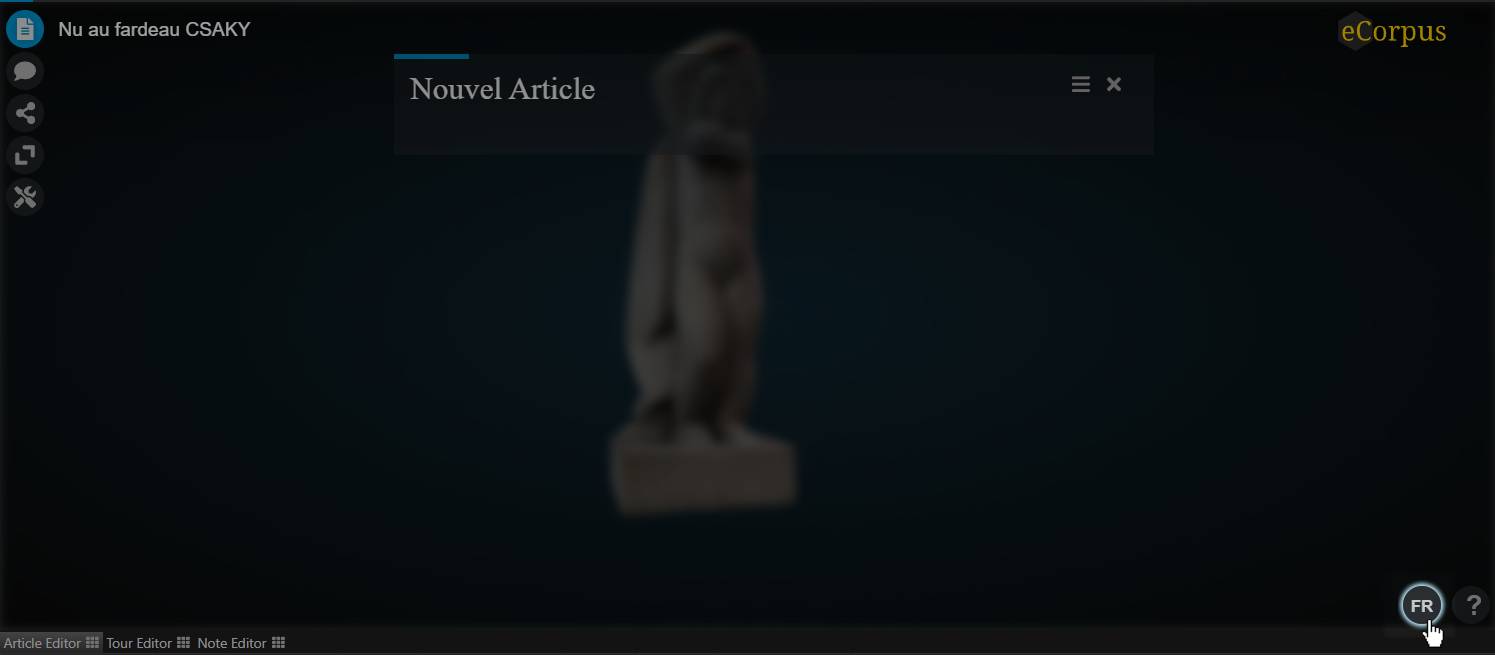
You can check the language of your scene at the bottom right of the Explorer window. By clicking on it, you can change the language of your scene depending on the available languages
Note that the languages proposed correspond to the languages already used in your scene. If you want to change your scene to a language that has not yet been used, simply create an element in the desired language. This can be done in the scene settings, in annotations, articles or even guided tours.
Learn more
If you want to learn more about eCorpus features, you can visit this guide: Create Guided Tours.